Friday, September 23, 2016

Quinoa-Stuffed Eggplant

We are cruising through the Eggplant Expanse at the moment.  Well... it's not really THAT expansive, supplies are low with those lovely purple fruits so the pressure is on to find good recipes.  It is sometimes tricky being the Captain and Cook aboard this ship called Wheatless because as cook, I can't complain to the Captain!

Last night I found a recipe that was a real hit!  YAY, I love it when that happens!  It's a fairly simple recipe.... ok... well... except for hollowing out the eggplant.  I flipped it everywhere and almost took out an eye, but I was hanging tough till I did a round with the onions.  I tried to work fast since those things give me an aromatic sucker punch every time.  Luckily I made it through with minimal tears this time. :)

So let's get to it!
*I did take a picture of the stuffed eggplant, but for whatever technical reason, it's not on my memory stick!  The following is a picture of all the ingredients mingling and doing their thing in the skillet before getting cozy in the eggplant shells. 


Quinoa-Stuffed Eggplant

1 medium eggplant ( 1 1/4 pound )
2 Tablespoons olive oil
1 cup chopped & peeled apples
3/4 cup chopped apples
1/2 cup chopped celery
1/4 cup chopped fresh parsley
1/4 teaspoon dried rosemary, crushed
1/4 teaspoon dried sage, crushed
1/4 salt, or to taste
1/4 teaspoon pepper
1 cup cooked quinoa

1.  Preheat oven to 350 degrees F
2.  Cut eggplant in half lengthwise.  Scoop out and chop flesh leaving 1/4 inch of flesh in the eggplant.
3. Place the eggplant shells in the oven and bake for 20 minutes.
4.  Heat the oil in a large skillet.  Add the eggplant, celery, apples and onions.  Cook, stirring until softened (about 4 minutes). Stir in the parsley, rosemary, sage, salt, and pepper.  Stir in the quinoa.
5.  Place 1/4 of the filling into each eggplant shell. Bake 20 minutes or until heated through.

Variation: Add 1 cup chopped walnuts when you add the quinoa.


Wednesday, August 31, 2016

Exploring The Zucchini Nebulae and Enjoying Zucchini Coleslaw

Wow!  Looks like I've neglected my log reports for some time here.  My adventures have taken me a lot of places and exploring a lot of things.  In a previous post or two, I shared that my mom had passed a few years ago (not long after I started this blog).  I was having a hard time after that with family, life and health.  Did I mention that we (husband and I) lost 10 people in less then 2 years after my mom died?  The majority of that number were very close.  Let's just say I was drifting out there among the stars kind of aimless for a while and I honestly didn't care much that I was.

But there comes a time that that you have to get back in that Captains chair before your ship gets sucked into a black hole. Never to be seen from again!  I still sometimes feel like I'm struggling against the gravity hold of that blackhole, but I'm making progress!

So... time to share my adventures in the Zucchini Nebulae with a lovely Zucchini Coleslaw.
I'm sorry I do not have a photo to share.  I know photos make recipes rock! I'll add one when I make this again. :)

Zucchini Coleslaw

1 1/2 cups chopped cabbage
1 cup coarsely shredded zucchini
3/4 cup finely chopped pineapple
1/3 cup finely chopped green bell peppers
1/4 Mayo
1 Tablespoon thinly sliced scallions (green part only)
1/8 teaspoon salt or to taste
Freshly ground black pepper

Directions
Pretty much just toss it all around in a bowl.

Variation
 Substitute carrots for the zucchini

My Report.
It scored high with my First Mate (and hubby). I usually like a coleslaw made with vinegar and not mayo, but I did like this and will be making it again today!  I LOVE the pineapple in it too!!!!  Give it a shot, it is simple and easy.

Tuesday, April 7, 2015

Encounters of the Raspberry Chocolate Cheesecake Kind

I grew up eating Jell-O brand box cheesecake mixes.  I loved it and I thought that was what a cheesecake was all about.  Now... fastforward to the day I ate some REAL cheesecake, it was like being hit with a photon torpedo!

I've made cheesecake a few times and my hubby even took a crack at it once.  Needless to say you really have to work at getting the cream cheese and egg well blended or you come out with something that is like a big baked egg thing with lumps of cream cheese! This is no longer a problem, thank you Vitamix!!!!

So let's get to it, you don't want to read and endless ramble do you?  You just want to know how to make this delicious wheatfree confection of AMAZING!

I apologize for the photo.  Also I didn't use a springform pan so it got a little mangled when I was trying to get it out of the baking dish!  I didn't get pictures of the process of making it, I just didn't think of grabbing the camera or posting it online at the time.  It truly is wonderful though.  Enjoy!


Raspberry Chocolate Cheesecake

Crust

1 1/2 cups - ground pecans (or walnuts)
4 Tablespoons - melted coconut oil (or butter)
2 teaspoons - xylitol or 1 drop liquid stevia ( I used Truvia baking mix at less then 2teaspoons)
2 teaspoons - unsweetened cocoa powder

Filling

16 oz. - cream cheese at room temp
3/4 cup - sour cream
3 eggs
1 Tablespoon - vanilla extract
1/2 cup - xylitol or 1/4 teaspoon liquid stevia or to desired sweetness ( Ok I did less then a 1/2 cup of Truvia baking mix and eyballed it)
1 1/4 cup - frozen sugar-free raspberries, pureed and strained*
1/4 cup - raspberries for garnish

Chocolate Glaze

1/4 cup - bittersweet (85% cocao) I just used dark chocolate Hershey's Morsels
2 Tablespoons - butter
1 teaspoon - milk or half & half ( I just used some canned coconut milk I had leftover from something else)

Preheat the oven to 350 degrees

Make the crust by chopping the nuts and mix the butter or oil, sweetener and cocoa.  Press into the bottom of a 9" springform pan. Then bake for 10 minutes.

To make the filling.  With an electric mixer, beat all the ingredients (except raspberries) until smooth then stir in the pureed raspberries. Pour into the crust and bake for 40 minutes or until knife inserted into center comes out clean.

Cool completely on rack then refrigerate until ready to serve. Remove from springform pan an place on serving plate.  Glaze.

To make the glaze I placed chocolate chips, butter and coconut milk in a dish and melted it down in another pan of boiling water. Drizzle over the cooled cake.  Refrigerate for 30 mins or until glaze is set. Garnish with raspberries.

* Personal notes: I didn't puree or strain the raspberries since I threw everything for the filling into the Vitamix starting with liquids first and then hit the puree option. I also didn't drizzle the glaze I just smeared it on the top in a layer. I didn't have parchment paper to place under the cheesecake so I made the cheesecake in a round glass baking dish. Of course you can imagine how fun it is getting out the first piece without a proper pie server.  The picture may not show a beautiful, perfect piece BUT it was delicious!


The Vitamix Expanse

We have found ourselves adrift in the "Vitamix Expanse". 
After a meeting with the crew ( yeah ok it was my husband and I, but that doesn't really sound as fun now does it?), we decided to take the plunge.  He made the final call on the model and put an end to my almost OCD obsession with finding just the right one for the cheapest price.  I'm so happy he did, I'm a penny pincher and I admit that I can drive myself crazy and yes... I had made a spreadsheet.  Oh yes, yes I did. 

With a health scare too horrible to even talk about, I've been making changes over the last year and a half.  The Vitamix is going to help me build my immune system back up by helping me get more leafy greens, veggies and nutrients in my body.  A healthy immune system can heal the body on its own... without it, you will see all manner of symptoms pop up (which are categorized as different diseases).  I wont trip off into all that, I've learned a lot and it's easy to want go on about it!

Another GREAT reason for a Vitamix is the fact my hubby doesn't take the time to eat breakfast. To remedy that situation I've been mixing him up hearty smoothies in the mornings to get the nutrients and calories in him!  Take that! 

So far the journey into The Vitamix Expanse has us exploring smoothie options, but we've recently discovered gazpacho, guacamole, cheesecake and I've made some nut meal.  Oh the possibilities!

See next post for a wonderful Raspberry Chocolate Cheesecake!   

Tuesday, September 23, 2014

Strawberry (or blueberry) Coconut Biscuits

Since I didn't have strawberries, I decided to grab the wild blueberries out of the freezer.  So the recipe "Strawberry Coconut Biscuits" turned into Blueberry Coconut biscuits.  Another change I made was the use of sweetened shredded coconut instead of unsweetened and then I omitted the sweetener.

The original recipe is as follows, but I'll put my substitutes in ( ) for you!

This is what the strawberry-coconut biscuits are suppose to look like.
Sorry about the orientation, I do not know how to fix that.  :(

Strawberry-Coconut Biscuits

*Makes 20 biscuits*

1/4 cup ground golden flaxseeds
1/4 cup cold water
1    cup coconut flour 
1/2 cup shredded unsweetened coconut ( I used sweetened )
Sweetener equivalent to 2 Tablespoons sugar ( I omitted )
1 teaspoon baking soda
1/4 teaspoon sea salt
3/4 cup strawberries, finely chopped ( I used frozen wild blueberries )
1/2 cup coconut oil
1 egg

Directions
Preheat oven to 375 degrees.  Line a baking sheet with parchment paper ( or silicone baking liner ).

In a small bowl combine flaxseeds and cold water. Place in freezer for 5 minutes.

In a large bowl combine the flour, coconut, baking soda, salt, sweetener, and strawberries (blueberries).  Mix well and stir in the oil and combine thoroughly.

Remove flaxseed mixture from the freezer and whisk in the egg.  Stir into the flour mixture.  The dough  will be stiff!  Use a cookie scoop or a spoon.  I just used a spoon, it worked.

Bake for 17 minutes, or until a wooden pick comes out clean when inserted into the middle of a biscuit.

YES... The blueberries turned them green! 


My Review

 Ok when the directions said the dough would be stiff, the author wasn't kidding on that.  It took some effort to really mash it all around when I combined the flaxseed mixture to the dry.  I wanted to make sure everything was moist and wet.  I'm thinking now that perhaps I probably should have defrosted the blueberries.  Yeah, that might have gone a bit better!
Anyway it all was actually pretty easy and I enjoyed making this recipe.

Taste test.  Personally, I can taste the baking soda and I'm not diggin' it too much.  It seems a bit crumbly, but it is also moist and light at the same time.  The blueberries are making them look a bit weird, but I can get over that!  All in all, I would make this recipe again with strawberries and maybe try less baking soda.  For the most part, the texture and taste is a winner for me.  Now.. time for another bite.

P.S.  The recipe is from Wheat Belly 30-Minute (or less) Cookbook by William Davis, MD.  I HIGHLY recommend his Cookbooks.  His original book Wheat Belly is an awesome source if you want to know WHY we shouldn't eat wheat and a wealth of other info on health and nutrition.  He is a cardiologist and some of his patient stories are interesting.

Thursday, August 21, 2014

Chia Pudding

I have been exploring a sector of nutrition in the Chia Cluster.  My findings show that they have amazing benefits, are rich in antioxidants, all the carbs in them are fiber, they are high in quality protein,  high in Omega-3 fatty acids, improve certain blood markers which may lower the risk of heart disease and type2 diabetes, and...
Chia seeds are reported to really pack a nutritional punch:
A 1 ounce (28 grams) serving of chia seeds contains (12):
  • Fiber: 11 grams.
  • Protein: 4 grams.
  • Fat: 9 grams (5 of which are Omega-3s).
  • Calcium: 18% of the RDA.
  • Manganese: 30% of the RDA.
  • Magnesium: 30% of the RDA.
  • Phosphorus: 27% of the RDA.
  • They also contain a decent amount of Zinc, Vitamin B3 (Niacin), Potassium, Vitamin B1 (Thiamine) and Vitamin B2.

I'm very fond of a Chocolate Chia Pudding recipe I found on YouTube.  But the recipe calls for chocolate drinking mix which is more sugar then chocolate so I just used 100% chocolate powder and added sweetener.  Sometimes I got too much of a Stevia aftertaste and sometimes I got it just right.  But that's the thing... tweaking is unpredictable.  Also each person will like more or less sweetener.  If you do not mind the sugar, totally go for the chocolate drinking mix.  I'm sure that would be very good!

Here is the video I found that I really like for  Chocolate Chia Pudding

Just last night I made this Vanilla Chia Seed Pudding 
It was pretty good, instead of using all coconut milk, I used half greek yogurt to make the thicker version.  I just finished eating some for breakfast.  I like it.  I didn't have any toppings this time around, so the picture I took really doesn't look that appealing.  

Have fun with Chia!  I know I will.  :)

Wednesday, July 30, 2014

Wonderful Chocolate Chip Cookie Way

A crewman pointed out last week that we have not documented the wheatless chocolate chip cookie phenomenon.  After reviewing my logs, this was confirmed.  So we made a coarse correction and were on our way to a familiar and wonderful region of space known as "Chocolate Chip Cookie Way".  We've decided to spend a little extra time for shore leave and I didn't hear any complaints about that!

The chocolate chip cookies are wonderful!  I would prefer them over the regular type made with wheat flour any day.  I started out making the recipe with almond meal that I ground in my food processor.  The texture was not like the traditional cookie, but I honestly didn't care.  I LOVED the taste so much and the texture seemed irrelevant.  Eventually I did decide to splurge and purchase some finely ground almond flour and just see what the fuss is all about.  It did come out looking and preforming like a traditional cookie in the texture department.  I might consider using almond flour when preparing some as gifts or having people over to entertain!

I highly recommend this recipe.  Don't be afraid to dabble with it and change it up.  I do find myself wondering about using 1/3rd or 1/2 coconut flour?  But that is an adventure for another day.


Almond Flour Chocolate Chip Cookies

4 cups almond meal/flour
1 teaspoon baking soda
1/2 teaspoon salt
4 eggs
1/2 cup butter or coconut oil, melted
1/4 cup sour cream or coconut milk (I have used whipping cream and raw cows milk and it's fine)
2 teaspoons vanilla extract
1/2 teaspoon liquid stevia (Sweetener equal to 1/2 cup sugar)
10 ounces bittersweet or dark chocolate chips ( I just use the semisweet)

Preheat oven to 350 degrees. Line cookie sheets with parchment paper.

Whisk together almond meal/flour, baking soda & salt in a large bowl.

Combine eggs, butter (or coconut oil), sour cream (or coconut milk), vanilla, and stevia in a small bowl and whisk.  Stir this into the flour mixture just until combined.  Stir in the chips.

Drop heaping tablespoons onto the baking sheet.  Press each cookie to 1/2 inch thickness.

Bake for 25 minutes, or until edges are lightly browned.  Remove and place on rack to cool.

ENJOY!


Monday, July 21, 2014

Bread, oh lovely sandwich bread!

Sorry I haven't posted lately, but I'm back on the bridge of this crazy ship I call Wheatless.  I'm trying to take my duties seriously after being held captive for a while by the inhabitants of a dangerous planet in the star system Apathy.  Motivation free living was their game and it was a struggle to break free.  The tactical ship Discouragement is in hot pursuit, but I think with a little extra effort we can shake them!

I put some distance between us while exploring the Manna Cluster.  I've discovered several bread recipes that I hoped would be perfect to make sandwiches.  Who wants to explore Wheatlessness on basic, boring rations!  I had some failures with something I found called "Broccoli Bread" that called for whey isolate.  I attempted that recipe twice and then gave up on it and then I found Dr. Davis' Basic Bread recipe in "Wheat Belly Cookbook".  I was jumping for joy when I finally pulled out a loaf of bread that had risen to the occasion!

You know how I like to be thrifty, but so far I have not attempted to use almond meal or use more garbanzo bean flour then almond flour yet.  For me it would be cheaper, but I just LOVE this recipe cuz it works so well.  I will update with other versions and let you know how it goes.

I'm sorry I do not have the wonderful picture of it sliced.  I can't seem to find the photos on my camera.


Basic Bread

1 1/4 cup almond flour
1/4 cup + 1 Tablespoon garbanzo bean (chickpea) flour
1/4 cup ground golden flaxseed (I've used milled regular and golden and it seems fine)
1 1/2 baking soda
1 teaspoon cinnamon (optional)
1/4 teaspoon sea salt
5 eggs, separated
1/4 cup butter, melted
1 Tablespoon buttermilk (I've just used cream or regular milk)
1 Tablespoon xylitol or 4 drops of liquid stevia or to desired sweetness (I've tried both sweeteners and also just left them out all together on one go... why sweeten it?  It's for a sandwich!?)


Preheat the oven 350 degrees. Grease an 8 1/2 x 4 1/2 loaf pan.

In a food processor, combine the almond flour, garbanzo bean flour, flaxseeds (in my case flaxseed flour), baking soda, cinnamon (if using), and salt.  Pulse until blended then add the egg yolks, butter, buttermilk, and xylitol or stevia and pulse just till blended.

In a large bowl, beat the egg whites with an electric mixer until soft peaks form.  Pour into the flower mixture and pulse until the egg whites are evenly distributed, but do not run the machine at a constant speed.  Spread into the pan and bake 40 minutes, or until a wooden pick comes out clean.

Cool in the pan for 10 minutes.  Remove and cool completely on a rack.

I am VERY HAPPY with how this bread turned out!  I will admit that the smell of the bread reminds me of my aunts beauty shop!  My mother-in-law says that is the smell of the baking soda.  It doesn't affect the taste at all and I just ignore it.  It is easy to do when you are slapping on lovely sandwich ingredients and enjoying the ability to eat a nice GLUTEN and STARCH FREE sandwich!  Oh yeah... awesome.  

Set phasers to "Knock You Out" because it will.  

I can't wait to get in there and do some tweaking.  I have considered... BLUEBERRY bread!!!  Imagine pumpkin bread, whatever you like!  Then on the savory side... break out different seasonings and go for it!  I hope you enjoy this as much as we do!!!!!


Wednesday, May 21, 2014

Minefield of Maltodextrin

I've been navigating a minefield of Maltodextrin lately and didn't even realize the danger of it.  Sure, I thought it was some kind of sugar alcohol or something and I've been compromising on my sugar off and on since my mom passed away. BUT I know that is no excuse and if she were here she would bust me to the Starship Wheatless' brig!  Anyway, this evil thing called Maltodextrin is actually part of a larger minefield of the most problematic hidden sources of wheat and gluten.  I share the list at the end of this post.

For the past year and a half, I've been eating some meal replacement bars off and on (Adkins).  A friend had given us a cargo bay full of them!  We try to pass them on to people that we might find in need (people on the side of the road and etc).  Sure, I checked the labels and nothing sounded like wheat or gluten, but I should have known better!  Anyway, I got lazy and they came in handy.  So that said what affects did it have on me?

Looking back on my romp through this minefield, I've noticed several things: increase in cravings and a regression of my health (pain & discomfort).  As I type this, I am munching on some semisweet chocolate morsels.  Yeah... I just can't keep those in bulk anymore because I will eventually lead daily raids on the supplies!  Potato chips and ice cream have also been and urge.

Besides the sugary cravings, there is the pain and discomfort.
Ok... it is NOT to the level of before I totally went wheat free, but I've been regressing steadily enough to worry me.  Oh and there has been the tiredness too, heck some days I have crashed on the couch just warn out.  So as of today, I am saying NO to these meal replacement bars and along with them the slight weight gain (off and on), the literal pain in the neck (and other places), and they have given me some digestive issues that has resulted in a trip to the pharmacy aisle!

Through all this, I've learned that if I do not have Ciliac Disease, then I most certainly have a gluten sensitivity.  I suspect Ciliac due to the severity of certain symptoms throughout my life before going wheat/gluten free.

Anyway here is a list of some of the most problematic hidden sources of Wheat/Gluten according to Dr. Davis' book "Wheat Belly Cookbook".  I urge everyone to go buy his books.  Keep them, highlight them and refer back to the information!  The excerpt follows:

Colorings/fillers/texturizers/thickeners:
These hidden sources can be among the most problematic, since they are often buried deep in the ingredient list or bear misleading names that suggest they have nothing to do with wheat or gluten.  Unfortunately, there is often no way to tell from the label, nor will the manufacturer be able to tell you, since these ingredients are often produced by a supplier.  A useful rule of thumb: Whenever possible, avoid processed foods that are likely to contain such ingredients.

Artificial colors, Artificial flavors, Caramel coloring, Caramel flavoring, Dextrimaltose, Emulsifiers, Hydrolyzed vegetable protein, Hydrolyzed wheat starch, Maltodextrin, Modified food starch, Stabilizers, Textured vegetable protein.

So as of today, the Starship "Wheatless" is in need of a good overhaul!  As captain of this ship, I hope it is swift and I do not have a mutiny on my hands brought about by crazy withdrawal behavior!  Here is focusing on the best!

I feel tired... oh no... crashing?  Yes, I had eaten a few of those bars yesterday!


Wednesday, April 23, 2014

Cruising the Constellation of Coconut

I have been cruising in and around the "Constellation of Coconut Flour".  I broke down and purchased a pound of coconut flour for around $6.50ish.  I know, kind of on the expensive side and somewhat violates my penny pincher code, but for the sake of analysis, I just had to!

Thus far, I find that it performs much better then the coconut powder (very small granulated pieces) that I have been buying at Saraga International Market in Indianapolis.  I'm almost ready to put coconut on my monthly shopping list.  The texture is great in some of the baking I've tried with it, like pancakes.  Oh you know I would go there!

Today I am giving a breakfast cheesecake a go!  It is in the oven right now.  I do have concerns, the directions said "Pour mixture into the pan"... well, I used all the ingredients and did what it said.  I will admit when I was mixing part of the mixture till smooth, it didn't get to smooth... just kinda clumpy.  So I just kept going with it, what the author meant by smooth... I have no idea.  We will see when it comes out of the oven in a bit!

Breakfast Cheesecake

1 cup ricotta cheese, at room temp (ok... mine might have been a bit on the cool side!)
1/2 cup coconut flour
Sweetener equivalent to 1/4 cup sugar ( I used 3 teaspoons liquid stevia based on a conversion chart )
4 teaspoons lemon juice
4 eggs, separated
1 teaspoon vanilla extract

Directions:
Preheat oven to 375 degrees.  Grease a 9"x9" baking pan.

In a medium bowl, place the cheese, flour, sweetener, lemon juice, egg yolks, and vanilla.

In another medium bowl beat the egg whites on high till stiff peaks form.  Then beat the cheese mixture (with the same beaters) until smooth.  Fold the egg mixture into the cheese mixture till thoroughly combined.

Pour into baking pan.  Bake for 20 mins or until the edges begin to brown and a wooden toothpick comes out clean.  Cool slightly before serving.

Soooo.... how did mine turn out?  Well, I left it in about 5 mins longer because I didn't see any browning happening through the glass.  It is cooling at the moment before I can prep it for a picture.  I'm so sorry I didn't take pictures of the whole process!  I just didn't think to blog this until after I put it in the oven!

While I'm waiting for it to cool, my penny pincher self is wondering what could I mix in with the coconut to bring down that cost a bit?  Would it affect the taste in a bad way?  Humm???  Something to think about and perhaps try maybe in a little while after I have tasted the original.

I can smell it in there cooling.  It makes me think of the beach!  But coconut smells kinda do that to me.  It has drowned out the smell of 7 pineapples that were making the kitchen smell like a Hawaiian paradise earlier!  Ok.. I think it has "slightly cooled" time to taste test!!!!


Oh yeah, wild blueberries as a topping!

Captains Log
I find this recipe to be in need of further study.  As it is, it is fine.  It seems a bit dry in flavor, but not in a bad way.  I suspect the ricotta is responsible for that since it is fairly dry in taste alone.  Adding the berries was a stellar idea if I say so myself.  It gave me some ideas about perhaps adding the blueberries to the mixture before baking just to see what happens!  Might be a flop, might not.  In conclusion I find this recipe in need of future exploration and good for a healthy breakfast! 

Sunday, March 23, 2014

Tuna-Spinach Burgers

This is one dinner mission I absolutely LOVE!  I find myself eating them even when I am not hungry, they are that good. Honestly it is RED ALERT when I'm near them.  If I had of had more spinach I would have doubled if not tripled this recipe.

Tuna-Spinach Burgers

Prep time 15 mins / total time 25 mins
Makes 4


3 tablespoons extra-virgin olive oil, divided
1 pkg (6 oz.) fresh baby spinach
2 cans (5 oz. each) wild caught tuna, drained
1/2 small red bell pepper, finely chopped
1 tablespoon Dijon mustard ( I didn't have this so I used Jalepeno mustard instead)
2 tablespoons Mayonnaise
1 teaspoon seafood seasoning or seasoning of YOUR choice ( I used Herb de Provence)
1 egg
1/3 cup finely grated Parmesan cheese
1/4 cup chickpea flour

In a large skillet, over medium-high heat, heat 1 tablespoon of the oil until hot.  Cook the spinach, stirring frequently, for 2 minutes, or just until wilted.  Place in a mesh colander and press the excess liquid from the spinach. Coarsely chop.

In a medium bowl, with a fork or the back of a spoon, break the tuna up into small pieces.  Add the chopped spinach, pepper, mustard, mayonnaise, seasoning mix, and egg.  Mix together until well combined.  Stir in the cheese and chickpea flour and mix well.  Shape the mixture into 4 burgers, about 3 1/2" in diameter.

In the same skillet over medium heat, heat the remaining 2 tablespoons oil until hot.  Cook the burgers for 6 minutes, turning once, or until golden brown and heated through.

Ok, there you have it. The official directions.
But like any other person on this little planet we call home, I don't always follow the directions exactly.  For one reason or another it just doesn't always happen.  This time around I ended up dumping all the ingredients into a bowl and mixing them up together.  It all turned out fine and nothing exploded from the slight diversion!

I also have to say, I have yet to get my spinach WILTED... it seems to always turn out cooked.  So just try to coarsely chop that spinach then!  So really big globs of spinach went into the whole mix.

I don't have a bunch of behind the scenes pictures of this adventure.  When I realized I wasn't mixing it all up in the right order I put the camera down.  Well, my hubby did snap a shop of some cooking action and then I got a shot of a plateful of the finished product (minus a small one because I couldn't help but eat it!).  Yeah... I didn't make 4 big ones, I made a few smaller ones!

Do try these and have fun.  Mix it up and add new and crazy things that sound good or just all around interesting.  Have fun with it!


Tuesday, March 11, 2014

Black Bean Cakes TWEAKED!

I shared this recipe 2 posts back ( Black Bean Cake ).  
I did like it as it was, but I just wanted to tweak the texture a bit and add my own touch.  I decided to follow the recipe exactly as it was, but add 1 cup almond meal.  I was thrilled with the result and could see the possibilities.  

Was it perfect?  I don't know about that, but it was every bit as chocolaty as the original.  I let a friend taste it that isn't wheat free and she really was amazed.  Her eyes got big after taking a bite and she said, "that is like a brownie!  I would eat more if you made me some."
That was totally awesome to hear!  

It is not the end to the tweaking.  I plan to make it again and try coconut flower or coconut powder ( very small granulated coconut ).  Of course I have learned that I may need to add a little extra moisture since coconut likes to absorb it all!  I can also imagine adding little chocolate chips to it too... my own little "Death By Chocolate" brownie.  Another idea would be to add a caramel topping to it.  It is endless I tell you!  

It takes time to tweak and get it how you like it.  I'm happy to say that I do like both variations I've made so far. So go on, don't be hesitant.  Climb into that Captains chair, plot a course and aim for the stars because you might just be surprised with what you get.  

Reality Bites

I want to thank everyone who has been following my little world here on the net.  I know that I've been a bit lacking on the posting front.

After my mother passed away, I have had moments where I thought, "What is the point of this blog?  There are so many others out there, who would want to follow me?"

I know I wanted to keep this about food and make it a bit entertaining.
Yes, I'm a nerd and geek and you've probably noticed with some of the Star Trek and other Sci-Fi themed verbiage.  But reality creeps in.  This is one of those times.  I almost quit this blog because there is a lot you go through mentally and emotionally when you loose the only other person in your life (besides your hubby) that you KNOW will always love you and be there for you.  So... it will be a year and a half in April that my mother passed on.  And I promise that I will continue this "Mission into wheatlessness" with a little more enthusiasm.

Soon I will be sharing an update on health and I will try give you a complete picture of what this lifestyle has done for me and my hubby.  ALSO... I have had some breakthroughs with my exploration into making chocolate brownies that are AMAZING!  I am still obsessed and lusting after the perfect wheat-free pancake so I will be sharing.

This week I hope we'll be able to make some TUNA SPINACH BURGERS.  Yeah, I know.  Some will probably find that title a total turn off, BUT!!!!!  The are so freaking addictive!!!!

Thank you for joining me on this mission.  It was a bit rocky, but I'm ready to go full light speed once again!

Sunday, February 16, 2014

Dark Chocolate Black Bean Cakes

I've been urging to go on a chocolate mission and I got my orders yesterday!  Red alert and battle stations and get ready for some Dark Chocolate!!!

I was sure I shared this recipe before, but I don't see it.  Anyhoo.  I found this great recipe for chocolate cake!  I did enjoy the original recipe, but this time around I wanted to tweak it by adding 1 cup of almond meal.  I felt like it might give it a bit more of a brownie like texture.

It is not a sweet recipe like conventional mixes or recipes. If you want more sweetness feel free to adjust to your taste!

So let's get right to it... well... after I go grab a small bite.  So dark and delicious!


DARK CHOCOLATE BLACK BEAN CAKES

Serves: 8

INGREDIENTS:
       Olive oil cooking spray
       1 oz dark organic chocolate (70% cocoa or greater)*
       1 1/2 cups soft-cooked black beans, rinsed and drained
       2 eggs
       1 egg white
       2 tbsp olive oil
       1/4 heaped cup unsweetened cocoa powder
       1 tsp baking powder
       1 tsp pure vanilla extract
       1/4 cup unsweetened applesauce
       1/2 cup raw organic honey
       1/4 to 1/2 cup unsalted walnuts, chopped
       1 cup almond meal

*I used bakers chocolate, I didn't have the other!

INSTRUCTIONS:
1.    Preheat oven to 350 F. Mist 8 individual ramekins or 1 8-inch square baking dish with cooking spray.
2.    Melt dark chocolate in a small saucepan over low heat with 1 tbsp water mixed in.
3.    Combine melted chocolate, beans, eggs, egg white, oil, cocoa powder, baking powder, vanilla, applesauce, almond meal and honey in a food processor; process until smooth. Stir in walnuts and pour mixture into prepared ramekins or baking dish.
Bake in preheated oven until the tops are dry and the edges start to pull away from the sides, about 20 minutes for ramekins and 30 minutes for baking dish. Garnish each piece with a dollop of nonfat Greek yogurt, if desired.

Thursday, January 9, 2014

Egg & Onion Salad

So what happens when a local store puts eggs on sale for 99¢ a dozen?  Well... I come home with 12 dozen eggs of course!  Ok, I know... "Are you nuts???"  My mission is too make up a lot of stuff to freeze to have for a later date.  However this mission log details something that will not be going in the freezer.

This mission was relatively easy, with very few casualties.  We did loose one valuable member of our "egg landing party".  Little Eggy just didn't make it through the aquatic adventure like his other 11 team members.

This is a simple and tasty recipe.  You can spread it on some wheat free bread, cracker or tortilla.  I'll be posting a recipe for 2 different variations for those next, so stay tuned! 

Egg & Onion Salad

Ingredients:
8-10 eggs ( I used 12 )
6-8   spring onions and or 1 finely chopped yellow or white onion
4-6 Tbsp Mayonnaise or rendered chicken fat
To Taste: Mild french wholegrain mustard (optional with mayo)
1    Tbsp Chopped fresh parsley
Salt & Black Pepper 

Directions:
Boil eggs.  I cover eggs with cold water then slowly bring to a boil.  I let it boil a while then reduce the heat.  Timing will depend on your stove.
Chopped eggs roughly after removing the shells.
Mix all ingredients in a bowl to taste.
Chill and garnish to serve.


Wednesday, December 11, 2013

Pizza Crust #1

This weeks mission: PIZZA!!!!
Nothing like going wheat free that will surely make you miss pizza like mad!  Sure there are those gluten free mixes out there, but I'm with Dr. Davis ( cardiologist/author of Wheat Belly )... the starches they use will just lead to heart disease.  So I don't bother with them.  This recipe got me a "high 5" from the hubby.

I'm very happy with how this recipe turned out.  It is easy to make and you can pick it up and eat a piece with your hands!  I normally just use a fork though, but the option is there.

The dough isn't like your traditional wheat dough, so just push that thought right out of you head right now.  It is like a big moist clump, but that is great because I think it is easier to spread out that way!

The moist dough, spread out with a spoon (next time I'll use a pin)

After the crust was ready it was time for toppings.  I just used what I had for a simple pizza

On goes the Prego and the cheese!


Just a few pepperonis!

Out of the oven (the first time)


I decided to pop it back in the oven and here it is the second time. Much better!


Wheatless Pizza Crust with NO STARCHES!!!! 

Ingredients
1 1/2 cups   shredded mozzarella cheese
1 1/2 cups   almond meal
1/4    cup    golden flax meal
1/4    cup    chickpea flour (garbanzo bean)
1 teaspoon  onion powder
1/2 teaspoon  garlic powder
1/2 teaspoon  sea salt
2  eggs
1/4 cup extra-virgin olive oil
1/2 cup water

Directions:
Preheat oven 350 degrees F.

Process the mozzarella cheese in a food processor until it becomes granular in size.
Combine the cheese, almonds, chickpea flour, flaxseeds, onion powder, garlic powder and salt in a large bowl.  Then stir in the eggs, oil and water and mix thoroughly.

Spread a large sheet of parchment paper over a large round pizza pan.  Place the dough on the parchment paper and lay another sheet on top then roll out into a 14 inch circle of dough.

Remove the top layer of paper.  You can use a spoon or your hands to form the crust edge.  Bake for 20 minutes.

Remove crust from oven and top with pizza toppings.  Put back into the oven long enough to melt the cheese and warm up the toppings.  Then enjoy!

*I didn't get mine to 14 inches or it would have gone off the edge of the paper.  I also didn't use the parchment paper and a rolling pin and did the best I could with a spoon, which next time.. I'll use the rolling pin!   I felt I needed to bake mine longer then 20 minutes.

Next time (which will be today) I am going to break this dough down into 2 mini pizza crusts.  I plan to bake and then freeze them to see what happens when I later take them out of the deep freeze and use when the urge for pizza hits again!

Tuesday, November 19, 2013

Hot 3 Bean Casserole

My mission:  Find a great "go to" dish that could go with anything.

I think I've found it with the Hot 3 Bean Casserole from The Vegetarian Bible.  I love this recipe and I do plan to make good use of it!  I can see taking it to pitch-ins or family dinners.  It is totally wheatless and gluten free!  I also think it is an easy and affordable recipe you can make on your stovetop, I do suspect you could throw it all in a crockpot set on low if you don't want to hover over a skillet.  I have yet to try it that way though.

The recipe calls for 1 tablespoon of Chili powder, but I ended up using 1/2 the amount of Red Chili Pepper Powder.  It was a trek on the zippy side, but not enough to go to RED ALERT.   Although most of the time in the kitchen, I hit RED ALERT.  I think I should just go out and get some regular Chili Powder but what fun would that be?


Hot 3 Bean Casserole
12 servings

Ingredients:
2 Tbsp. olive oil
1 cup coarsely chopped onion
1 cup chopped celery
2 cloves garlic, minced
1 can (about 15 oz.) chickpeas, rinsed and drained
1 can (about 15 oz.) kidney beans, rinsed and drained
1 cup coarsely chopped tomato
1 can ( about 8 oz.) tomato sauce
1 cup water
1 to 2 jalapeno peppers, minced ( I didn't use this ingredient )
1 Tbsp chili powder
2 teaspoons sugar 
1 1/2 teaspoons ground cumin
1 teaspoon salt
1 teaspoon dried oregano
1/4 teaspoon black pepper
2 1/2 cups (10 oz.) frozen cut green beans

Instructions:
Heat oil in large skillet over medium heat.  Add onion, celery and garlic; cook and stir 5 minutes or until tender.

Add chickpeas, kidney beans, tomato, tomato sauce, water, jalapeno pepper, chili powder, sugar, cumin, salt, oregano and black pepper.  Bring to a boil.  Reduce heat to low; simmer, uncovered, 20 minutes.  Add green beans; simmer 10 minutes or until tender

I double the recipe because I wanted lots of leftovers.  Following are some picture in progress, for a moment I was afraid my huge skillet wasn't big enough!


 Ok. I have to confess something.  I adden the green beans before I was suppose to and they lost a bit of color.  So you want to make sure you add them when the recipe says so you will have a nice presentation.


Wednesday, October 16, 2013

Pie Crust Wheat/Gluten Free

My hubby has been mentioning that he'd love to have a cherry pie.  I'm partial to crumbles and crisps, but it sounded like a worthy adventure.  So I grabbed a recipe that is gluten free, wheat free and starchy flour free!  Little did I know what a strange trip it was going to be!

This was my first ever pie crust so I can't compare it to making regular pie crust.  All in all, I think it was pretty freakin' easy!  I'm trying to be frugal as much as possible so you know what is coming... I substituted some garbanzo bean flour in place of some almond flour.  Sorry, but I'm not paying $10 for a tiny little bag of that stuff!  I know I could have used almond meal, but since the recipe called for a flour I wanted to go with something finer and closer on my first attempt.

As I sat down to type up the recipe, in the grip of a Benadryl induced haze, I realize that I might not have followed the recipe exactly as it was written.  Whoopsie!

Ok, it looks kinda pitiful and patchworky, but it is my first one ever!  
It is so ugly it is cute, yeah... let's go with that!


Basic Pie Crust

1 cup walnuts
1 cup almond flour, divided (I used 2/3 cup garbanzo bean flour + 1/3 cup almond meal)
2/3 cup ground golden flaxseed (I used golden flaxmeal)
2 teaspoons baking powder
1/2 teaspoon guar gum
1/2 teaspoon xanthan gum
1/2 teaspoon sea salt
1/2 cup unsalted butter, cut into cubes
1 egg
1 tablespoon vinegar
1 tablespoon water

Directions

In a food processor, pulse the walnuts until chopped.  Add 1/2 cup almond flour, the flaxseeds, baking powder, guar gum, xanthan gum, and salt.  Pulse until well blended.  Add the butter and pulse 10 times.  Add the egg, vinegar, and water, and pulse until just combined.  The dough will be wet.

Dust a work surface and your hands with some almond flour.  Place the dough on the work surface.  Knead the remaining almond flour into the dough.  Form into a disk.  Wrap dough in plastic wrap and refrigerate for 1 hour.

Sandwich the dough between 2 pieces of parchment paper that has been dusted with almond flour.  Roll out with a diameter of 10".  Peel off top paper and place a 9" pie pan upside down on top of the dough.  Turn dough onto the plate and gently peel off parchment paper.  Trim overhang and crimp edges.  Chill until ready to use.

To prebake, preheat oven to 350 degrees F.  Bake for 23 minutes, or until the crust is golden and no longer moist to the touch.

In my Benadryl haze, I really think I added 2/3 cup flour to the food processor and then kneaded in the 1/3 cup later.  I really thought I was following things exactly.  Crazy what medicine can do to your mind!  Why the heck didn't I DIVIDE the flour instead of breaking it up the way I did is totally beyond me!  Perhaps I should have called this post "Trippin' with Pie Crust"????!!!!

Wednesday, October 9, 2013

A Taste of Fall!

Pumpkin Spice Muffins from Wheat Belly with an improvised cream cheese icing.


About 8 months or so ago, I improvised a pumpkin muffin.  It was fabulously mild when it came to the pumpkin flavor and my husband enjoyed it right along with me.  He is not a big fan of the pumpkin pie or breads, usually.  I wouldn't have called it a "sweet treat" but more like something to eat along with a fall meal.  Anyway, I've been chasing that "pumpkin dragon" for a while trying to figure out WHAT recipe I altered.  

Well, the following recipe is not the one I improvised, but it is a good recipe!  Making this recipe has brought me closer to the elusive one... I think it jared some memories.  Next time I post a pumpkin muffin recipe I hope it will be the one!

If you like things a little more sweet and not concerned with sugar, don't use sweetener!
This is a wheat and gluten free recipe.  I think it will work with Paleo diets as well.

All the dry stuff

 All the wet stuff

All mixed up.  See how they stay "scooped" in the muffin tin??  I think next time I might try these little guys out on a cookie sheet to see what happens!

 Ok the improvised icing is a bit on the thick side, but it was good!


Pumpkin Spice Muffins

Ingredients

2 cups almond meal
1 cup chopped walnuts ( I didn't have any to spare so I skipped them)
1/4 cup ground flaxseed ( I used milled flaxseed)
SWEETENER equivalent to 3/4 cup sucrose
2 teaspoons ground cinnamon
1 teaspoon ground allspice
1 teaspoon grated nutmeg ( I subed more cinnamon )
1 teaspoon baking powder
DASH fine sea salt
1 - 15 oz. can unsweetened pumpkin puree ( I used 16 oz. )
1/2 cup sour cream or coconut milk
2 large eggs
1/4 cup walnut oil, melted coconut oil, or extra light olive oil  ( I used coconut oil )

Directions

Preheat oven to 325 degrees F.  Grease a 12 cup muffin pan, or use liners.
Stir together the almond meal, walnuts, ground flaxseeds, sweetener, cinnamon, allspice, nutmeg, baking powder and sea salt in a large bowl.

Stir the pumpkin puree, sour cream, eggs, and oil in another bowl.

Stir the pumpkin mixture into the almond mix thoroughly.  Spoon batter into the muffin cups filling them half full.  Bake until toothpick comes out dry.  About 45 minutes.  Cool muffins for 10-15 mins then turn onto a rack to cool.

Bakers Log Stardate 1092013
OK... HOLD UP!!!
1. I'm here to tell you that if you fill those tins up half way you will get MORE then 12.  I used the regular sized muffin pan too and yes there was that extra ounce of pumpkin puree.  So just count on possibly getting more then 12.
2. If you fill them to the top like I did it also seemed to take FOREVER to get the inside cooked!!!  yeah, yeah... I know, I over filled them!
3. I also realized, after the fact, that with the texture of the muffin mix that you MIGHT be able to scoop out some on a baking sheet and bake that way.  Just for kicks, I may do this in the future.

IMPROVISED Cream Cheese Icing

1 bar cream cheese
1 tablespoon vanilla extract
sweetener/sugar to taste

Mix together.  This might seem a bit thick to you and if you have some whipping cream you can add a little at a time to get it to the consistency you prefer.  Enjoy!


Tuesday, October 1, 2013

Coconut Bread

I found a recipe for Coconut Bread that I wanted to try.  I was really hoping it would work out.  The recipe calls for Coconut FLOUR, but all I had was something labeled Coconut Powder... it isn't fine like flour and a little course with a meal-like texture.  It is a less expensive alternative.

I turned on some Jimmy Buffet music and soon I was prepping things whilst in a kitchen in Margaritaville.  I could almost taste the salt air, especially when I was opening the sea salt and it went everywhere!  It kinda added to the beachy feeling underfoot and I wont tell you where I found a few grains of salt later!

Coconut Bread

Ingredients:
6 eggs
1/2 cups ghee (or butter)
1-2 tablespoon honey, depending on taste
1/2 teaspoon sea salt
1 teaspoon baking powder
3/4 cup coconut flour*
Method:
Preheat your oven to 350. Whisk it all together, or blend in a food processor until all lumps are gone. Grease a bread pan with butter or coconut oil and pour your batter in. Bake for 40 minutes.

*I used coconut powder which is finely chopped coconut, but it is NOT as fine as powder!!!  
My Ingredients

Mixing things up in the food processor


Right out of the oven.  Lookin' promising!

 Even though I buttered the daylights out of this pan, it stuck!

The middle didn't cook up as well as the ends.

It was a tad eggy and VERY buttery (from my butterfest trying to keep it from sticking to the pan?).  BUT I HAD AN IDEA!!!
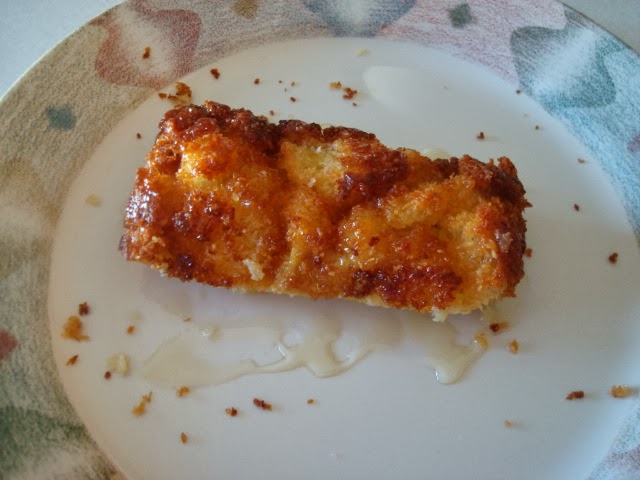
The next morning I warmed up a chunk, drizzled it with honey and it tasted pretty good!

I don't know if I'll make this again, we will see in time. I try to be thrifty and I'm not so sure about purchasing Coconut Flour, the coconut "powder" I buy is VERY affordable.  If I do make this again I'll do it in some whoopie pie pans or muffin tins to help cook the middle more evenly.  :-)